Open
Sign & keychain in Model Studio.
Build printable signs, keychains and QR tags, with AirTag, NFC, magnet, bolt-head and nut pockets. Model Studio creates measured raised or engraved STL geometry on the server, through the website or Android app.
Create a printable tag with words, mounting features or a scannable code.
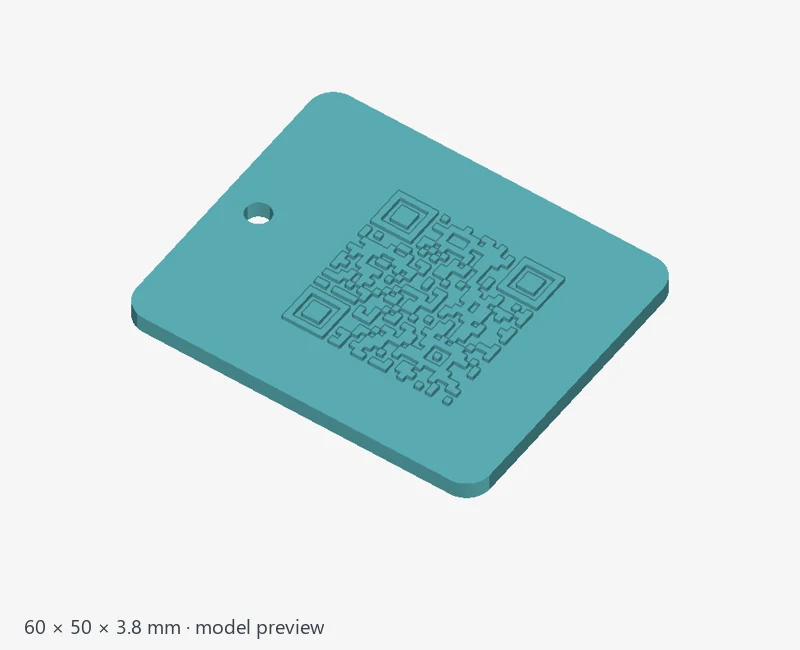
Open the 3D Printable QR Code Generator for a QR keychain layout, or use Sign & keychain in
Model Studio for another design. Always scan the finished print before making more copies.
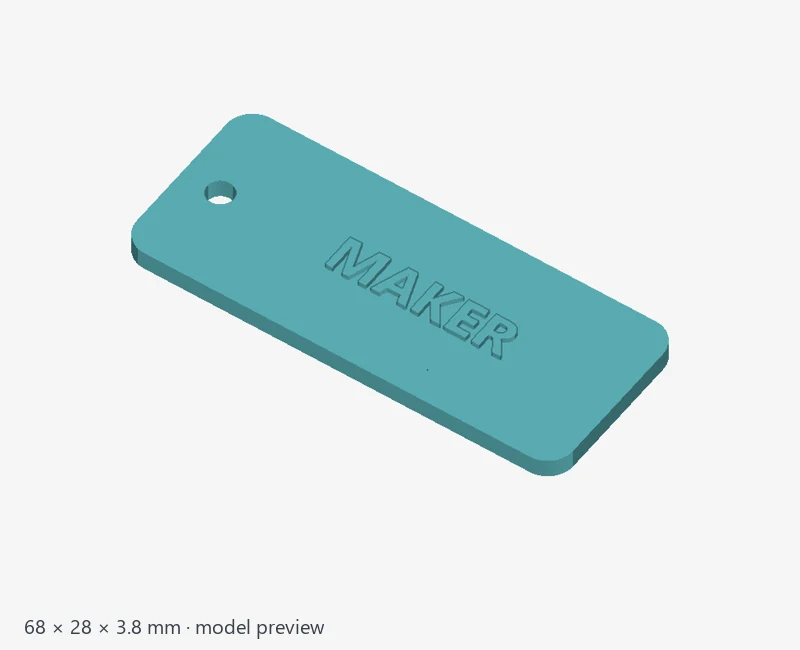
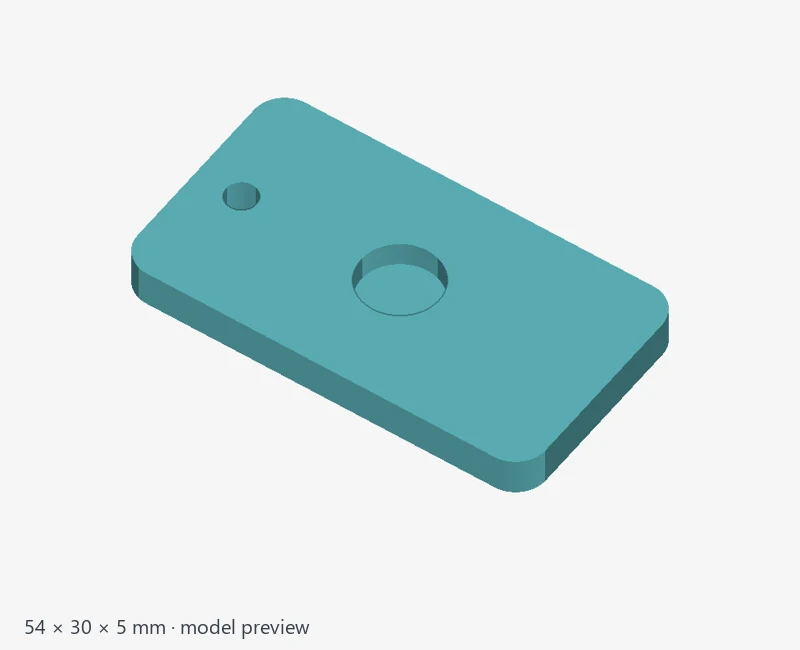
Use Recreate this sample on each sample card for the exact tested MAKER, QR and magnet-tag steps.
1. SHAPE & SIZE
Open Model Studio and choose Sign & keychain. Choose a rounded rectangle, rectangle, circle, oval, hexagon, heart, capsule or luggage tag. All dimensions are in millimeters. A circle uses its width as the diameter. Sign thickness supports 1.2–30 mm so thicker hardware can fit.
Choose Raised or Engraved details and set their height/depth. Engraving must leave at least 0.8 mm of base. Optional Border width adds an outline in the same detail style; 0 means no border.
2. WORDS & FONT
Enter up to 120 characters over three lines and choose Bold, Clean or Monospace. Leave Words blank for an artwork-only or QR-only design. Font size is nominal: actual letter height varies by font, and the preview shows the real outlines.
X/Y positions start at the sign center. Positive X moves right; positive Y moves up. Rotation is in degrees. Resize or move lettering if it reaches an edge, hole or open hardware pocket.
3. SYMBOLS & PICTURES
Choose a heart, star, paw print, lightning bolt, house or arrow, then set its size, position and rotation. Symbols and letters join the base, including separate dots and paw pads.
Upload PNG, JPEG or WebP up to 5 MB. Adjust Artwork threshold and Use light areas instead to select a silhouette; transparency is respected. Pictures become monochrome geometry, not a color texture or 3D reconstruction. Use simple high-contrast artwork you have permission to share. Inspect any tiny marks removed by the preview.
4. QR CODE
Enable Add a QR code or choose Use QR keychain layout. The starter makes a 60 × 50 mm tag with a keyring hole and a 36 mm QR square. It keeps your QR text while replacing the rest of the layout, including hardware pockets. Generate any unsaved design you want to keep before choosing a starter layout.
Enter a website address with https:// or plain text. Content is encoded as entered, up to 200 UTF-8 bytes; non-ASCII characters can use multiple bytes. Shorter text makes simpler codes. The static code needs no redirect subscription. The builder adds no scan tracking and cannot change the encoded content after printing.
Set QR size, X/Y, rotation and error correction: Medium, High or Highest. More correction can make the code denser and require a larger size. QR size includes a protected four-cell blank margin on every side. This builder requires cells at least 0.8 mm wide; increase the size or shorten the content if the preview asks you to.
Keep words, artwork, borders, holes and open pockets outside the entire QR square, including its blank margin. An enclosed pocket can sit behind the code when enough solid roof remains.
After Update 3D preview, scan the black-and-white QR image to check the content. Download QR image saves a PNG. This image check does not replace scanning the finished 3D print.
STL contains shapes, not colors. Use dark cells on a light background. For raised cells, change filament above the base; this affects all geometry printed at those heights. Engraved cells can be painted. Preserve the blank margin, inspect toolpaths and test-scan the physical print; single-color preview shading does not guarantee scanning.
For a self-standing QR sign, paint the cells or use multi-material painting in a slicer. The tilted QR cells span different Z heights, so a single layer-based filament change cannot color all of them while keeping the whole plate light.
5. KEYRING & MOUNTING HOLES
Choose One keyring hole, Two mounting holes or No holes, then adjust each hole's X/Y position and diameter. Add up to eight holes. Each opening must leave at least 1.2 mm to the outside edge and adequate separation from other holes. Keep decorations clear of openings.
6. HARDWARE POCKETS & FASTENERS
Add up to six pockets using + AirTag, + NFC tag, + Magnet, + Bolt head or + Hex nut. These create spaces for hardware you supply; they do not print a functioning tracker, NFC device, magnet or metal fastener.
Measure the actual hardware. Enter its diameter/width, rectangle height where applicable, thickness, fit allowance, X/Y and rotation. The allowance is added to the overall pocket diameter/width, height and depth; it is not an allowance per side. For example, a 6 mm diameter, 2 mm thick magnet with 0.3 mm allowance gets a 6.3 mm diameter, 2.3 mm deep pocket.
Round, rectangular and hex seats are available where appropriate. Hex size is measured across flats. Bolt-head and nut seats include a through-hole for Bolt shaft diameter plus the allowance; these are clearance holes, not printed threads.
Open pocket: insert and secure the hardware after printing. The pocket opens on the detail side and must leave at least 0.8 mm of floor beneath it. It cannot overlap text, artwork, a border or the QR square. The recess does not automatically provide a snap fit, lid or retention mechanism.
Enclosed / pause: capture the hardware inside the print. Floor below enclosed pockets sets the bottom of the cavity above the build plate. Leave at least 0.8 mm of roof below any engraving. Add a printer pause before that roof starts; the next section explains how.
Fit thickness to hardware increases sign thickness as needed, up to 30 mm. It does not enlarge the outline, move pockets or resolve overlaps. Pockets, mounting holes and outside edges need at least 1.2 mm between them. The preview rejects collisions and insufficient material.
Use AirTag keychain layout replaces the current design with a 70 × 50 mm tag, one keyring hole and an open circular pocket for a nominal 31.9 mm diameter, 8 mm thick AirTag. Confirm your own tag's dimensions. With the starter's 0.3 mm allowance and 1.2 mm floor, Fit thickness produces a 9.5 mm open-pocket base, or 10.3 mm for an enclosed pocket with raised details. This is not a tested snap-fit holder. An enclosed AirTag cannot be removed for battery replacement without opening the print; use an open pocket when service access is needed.
For NFC, supply and program the tag separately. Test reading before and after fitting it: the tag, plastic cover thickness and nearby metal affect performance. Keep magnets and fasteners away from its antenna where possible. Dry-fit magnets and check their polarity before securing them. Print a small fit sample before committing to a finished sign.
SELF-STANDING SIGNS
Under Shape & size, enable Add a self-standing base. Choose Rounded rectangle, Rectangle or Oval and set Base width, Base depth and Base thickness (2–15 mm). Sign angle is measured from the tabletop: 90° is upright, 75° leans back slightly and 60° leans farther back.
Fit base to sign sizes the width and depth for the current sign dimensions and angle. Use it again after making a larger sign or changing its angle. The builder joins the tilted sign, base and rear brace into one solid and checks that its center of mass stays inside the contact footprint. This digital check does not establish physical stability; test the finished print in its intended location.
Print with the base flat on the bed. Face view looks straight at the lettering even when the sign is tilted. Inspect raised lettering, overhangs and the rear brace in Slicer Studio before printing. Mounting holes and bolt shaft openings remain open through the brace. Open hardware pockets are supported; enclosed pockets require a flat sign because their insertion pause heights would no longer be horizontal.
The base, style, angle and sizes stay with the saved design. Editing any of them requires updating and confirming the preview again. The preview, downloaded STL and studio transfers use the same standing geometry. Leave Add a self-standing base off for the original flat sign or keychain.
7. PREVIEW & GENERATE
Select Update 3D preview. The server builds the actual solid. Drag to rotate; pinch or scroll to zoom. Face view helps check spelling, QR placement and pocket positions. Overall dimensions include the standing base when enabled and any raised details. Shading is not a filament assignment.
Show hardware spaces through the sign makes the body translucent and marks cavities in blue. Blue shapes are empty spaces for your hardware, not extra printed parts. Hardware fit & insertion heights lists final pocket sizes, shaft holes and roof Z heights for enclosed pockets.
Changing geometry invalidates the old review. Inspect the new preview, confirm the checkbox, then Generate sign / keychain STL. The server queue independently checks the generated geometry against the reviewed design, including lettering, holes and hardware spaces. Valid enclosed cavities remain empty; they are not extra disconnected printed pieces.
ENCLOSED POCKETS: ADD THE PRINT PAUSE IN YOUR SLICER
STL stores geometry and cannot add pause commands. Sending the model to Slicer Studio does not automatically schedule its insertion pauses.
1. Note every Pause before roof starts at Z height in the hardware report.
2. Send the model to the slicer, select the correct printer and filament, and slice it in the same flat, detail-side-up orientation. The reported heights assume the original model scale and orientation; re-check them if you transform the model.
3. Move through the sliced layers until you find the first layer that covers each pocket. In Slicer Studio use the selected-layer pause controls described in the Slicer Studio instructions, add the pause before that layer, and re-slice to include it in the downloaded G-code. Use the pause command supported by your printer and host. Layer numbers depend on the selected layer height; the reported Z value is not a layer number.
4. Inspect the floor, walls and roof bridge. Ensure supports or infill do not occupy the hardware space. Test the insertion workflow on a small sample.
5. At the pause, place and secure the hardware so it stays below the next printed layer, then resume using the printer's supported controls. Make sure the toolhead can move without contacting the insert. Check the completed part and the tag or magnet's function.
Example: an enclosed 6 × 2 mm magnet with 0.3 mm allowance and a 1.2 mm floor has a roof starting at Z 3.5 mm. Select the pause before the first layer covering that cavity in your actual sliced preview; do not enter 3.5 as a layer number. Several pockets may share one insertion height, while different heights may need separate pauses.
DOWNLOAD, EDIT & SHARE
Download the STL or use Send to slicer. Print flat signs detail side up and self-standing signs base down. Inspect lettering, QR cells, holes, pockets, braces and roof bridges before printing. Fine details may need a larger size or smaller nozzle. Geometry checks do not replace a physical fit, scan or print test.
Edit design as a new project restores the saved words, artwork, QR settings, hardware list, floor setting, standing base style and angle, and dimensions without changing the original. Review and generate again after editing. Clearing the form removes those features from the new design.
Designs stay private until you share them. Public listings exclude source artwork and saved design data, but STL geometry still reveals its design and QR content. Do not encode private information in a model you intend to share.
Open Model Studio
Slicer Studio instructions
Model Studio overview
Report a website or app problem
QR CODES, INSERTS AND FINAL FILES
The STL contains the sign geometry, including QR cells and hardware cavities; it contains no NFC programming, print pauses or filament-change commands. Generate the design and verify it is available in Saved projects before leaving; unsaved form edits are not a saved model. Select and verify insertion pauses in Slicer Studio, re-slice after adding them, and test QR scanning and hardware fit on the physical print.
RELATED INSTRUCTIONS
Model Studio tool directory ·
Slicer Studio ·
Support Fin Studio ·
Community models ·
Android app setup ·
Report a problem
 P0k3sm0t