
 P0k3sm0t
SEE WHAT THE TOOL MAKES
Try a studio sample
These previews show the actual downloadable models. They are geometry renders, not photographs of physical prints. Each kit includes print notes; choose your own printer and filament before slicing.
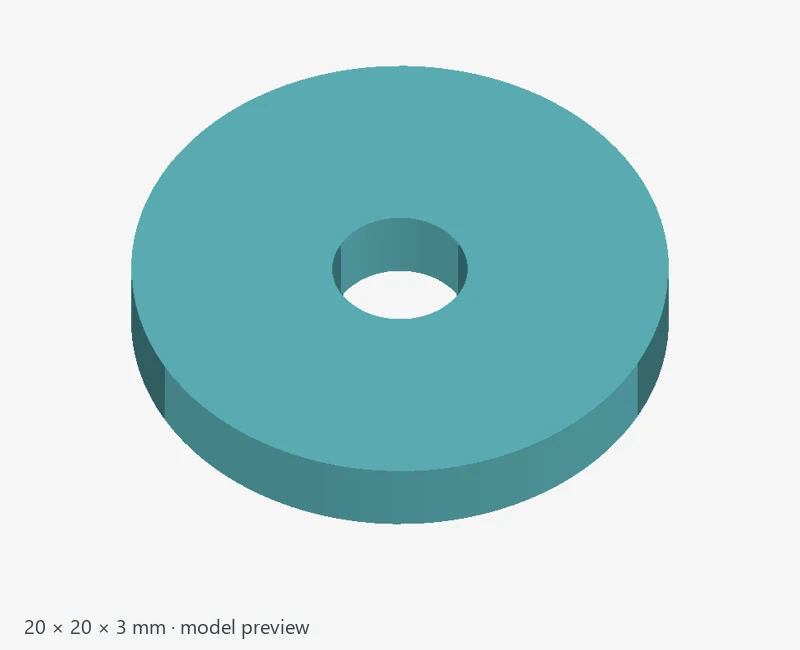
20 mm spacer ring
20 mm outer diameter, 5 mm bore and 3 mm height; no fit adjustment.
About this sample
Verified through the normal Measured part form and saved STL download. Use Recreate this sample for the exact tested steps and settings. Made by the Measured part spacer builder. Print flat on the ring face. Measure a small fit test before using a spacer in a working assembly.
Open Measured part in Model Studio.
MEASURED PART — SIMPLE SHAPES FROM DIMENSIONS
Use this generator when you know the measurements of a simple part. It builds the selected shape from the fields; it does not trace a photograph. To describe a mechanical part in words and review its proposed solids, holes and dimensions, choose CAD Designer instead. For one external gear or internal ring with straight, helical or herringbone teeth, use Spur Gear Builder; for matching two-part sets, use Gearworks. A measured spacer/ring is a smooth shape without gear teeth. Select either generator in Model Studio and use Instructions to read its forum post.
QUICK START
1. Open Model Studio → New model project → Measured part.
2. Enter a Project name and choose Part type: Spacer / ring, Plug with flange, Solid box, Flat plate, Sphere, Cylinder, Cone / frustum, Triangular prism, Hexagonal prism, or Two-piece interlocking coin stand.
3. Enter the dimensions shown for that shape. All measurements are millimeters. Measure the real part with calipers when fit matters; field labels identify outside sizes, holes and thicknesses.
4. Leave Fit adjustment at 0 for the entered dimensions. It changes diameters or X/Y dimensions; negative values make a tighter fit. Supported fit instructions in Design notes are applied and reported with the result. Other notes describe the project rather than adding arbitrary geometry. Avoid requesting the same allowance twice.
5. Select Generate and publish STL. Follow progress in the build table, then rotate the finished model and check dimensions, holes and mesh results. A successful result can remain private for review even though the button says publish.
6. Download printable STL or Send to Slicer Studio. Check orientation, supports and sliced layers before printing.
EXAMPLE: A SPACER
Choose Spacer / ring. For a nominal 20 mm outside diameter, 5 mm hole and 3 mm thickness, enter those measurements and leave Fit adjustment at 0. Inspect the reported dimensions, then print a fit test before making a batch. Printer tolerances affect the finished hole.
REPEAT THE SPACER SAMPLE
The sample card's Recreate this sample download lists the exact tested fields. Its STL was downloaded from a normal Measured part project, with no manual geometry changes. Design JSON is a settings reference, not an importable project.
TWO-PIECE INTERLOCKING COIN STAND
Choose that Part type and set panel reach, assembled height, plate thickness and slot clearance. For a 40 mm tall stand made from 2 mm plates, enter those values; 0.2 mm slot clearance produces a 2.2 mm slot. The two flat panels have opposite half-depth slots and assemble at 90 degrees. The STL lays them side by side for printing. The outline is a design approximation, not a tracing of a reference photo. Check the shape and test the sliding fit.
IF SOMETHING IS WRONG
An invalid dimension message means the selected shape cannot be built with that combination. Correct the named field and try again. For complex organic geometry, choose Photo to 3D; a description alone cannot turn a measured template into an arbitrary object. Mesh checks do not establish strength or physical fit.
SAVING AND SHARING
Reopen work from Saved projects. Eligible results can enter the free Generated Model Library; results requiring review stay private until reviewed sharing is available and its checks pass. AI-generated files cannot be sold on this site's marketplace. The main Model Studio instructions explain queues, generation limits, storage and sharing. To read another generator's instructions, select it in Model Studio and use the Instructions button.
WORKSPACE, SAVED PROJECTS AND PREVIEW CONTROLS
Choose a generator under New model project; the Instructions button follows the selected tool. Define your model in the setup card, then follow generation and checks in the build table. Saved projects can be searched by name or tool and filtered by status. Refresh projects updates the list without discarding the setup form.
In a completed project, Fit model, Top, Front and Bottom help inspect every side. Drag to rotate, pinch to zoom, and use two fingers or Shift-drag to pan. Pan view makes a one-finger drag pan the preview. Color, Solid and Wireframe inspect different aspects of a colored result. If the color preview cannot load, the solid STL remains available and Color retries the textured view. Preview cameras and display modes do not change the exported geometry.
Clear / start over resets the current workspace while keeping the selected generator. Saved projects and earlier versions are kept. A Reconnect notice lets you recover after a connection interruption. The page pauses background queue checks and refreshes status when you return.
PRINTING A MULTIPART MEASURED DESIGN
The interlocking stand exports two positioned panels in one layout. Keep both when the whole stand is needed. Do not import a combined layout and the same individual parts together. Fit adjustment controls the measured model; select the actual printer and filament after transfer.
RELATED INSTRUCTIONS
Model Studio tool directory · Slicer Studio · Support Fin Studio · Community models · Android app setup · Report a problem